Hole by Hole
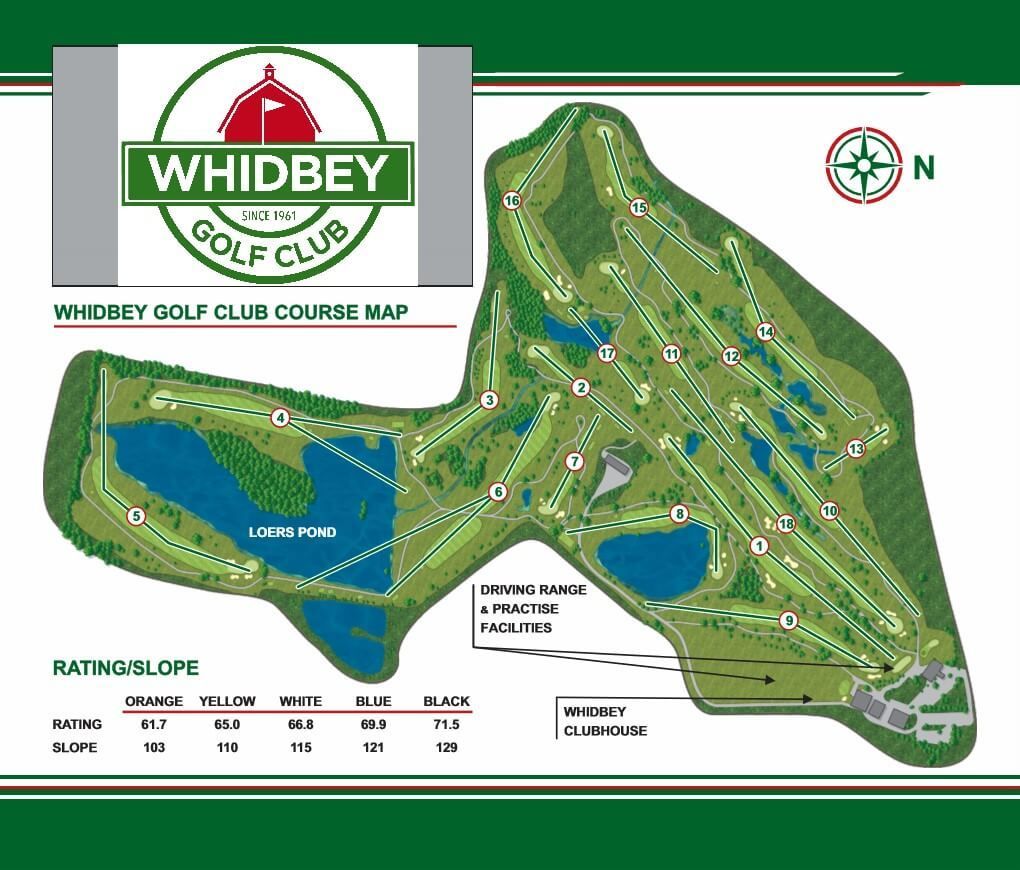
Whidbey Golf Club
| TEES | YARDAGE | MEN | WOMEN |
|---|---|---|---|
| BLACK | 6537 | 72.4/127 | |
| BLACK/BLUE | 6249 | 70.8/125 | |
| BLUE | 6077 | 69.7/124 | 75.2/131 |
| BLUE/WHITE | 5698 | 68.1/121 | 73.2/126 |
| WHITE | 5360 | 66.9/113 | 71.4/122 |
| GOLD | 5008 | 65.8/111 | 70.5/117 |
| ORANGE | 4207 | 61.8/103 | 65.3/100 |
Hole 1
Hole 2
Hole 3
Hole 4
Hole 5
Hole 6
Hole 7
Hole 8
Hole 9
Hole 10
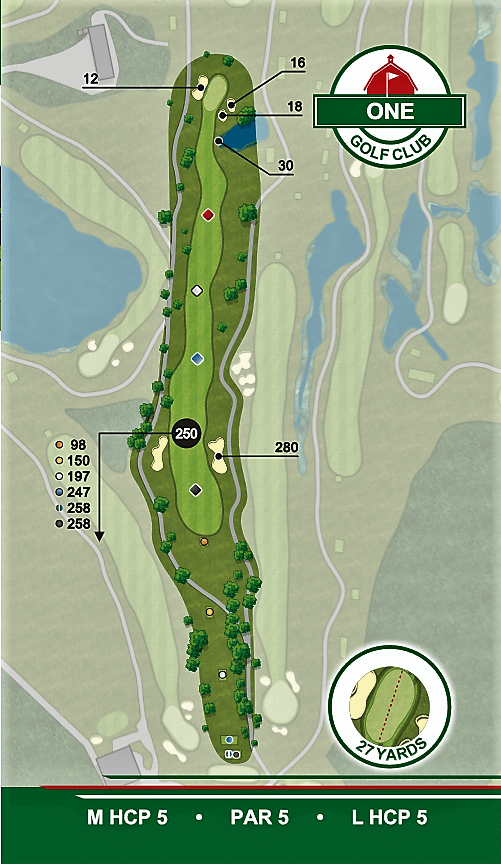
Hole #1: 516 yards | Par 5
Straight-away par 5, reachable in two for the longer hitters but watch out for the water that resides short and right of the green.
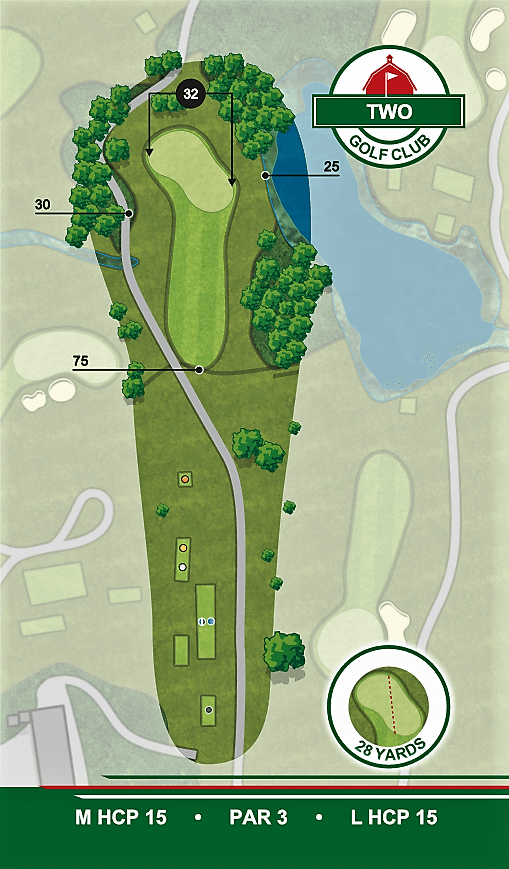
Hole #2: 182 Yards | Par 3
A 2 leveled green that slopes to the right toward water that is blind from the tee. Don’t miss long for the chip will most likely be undesirable.
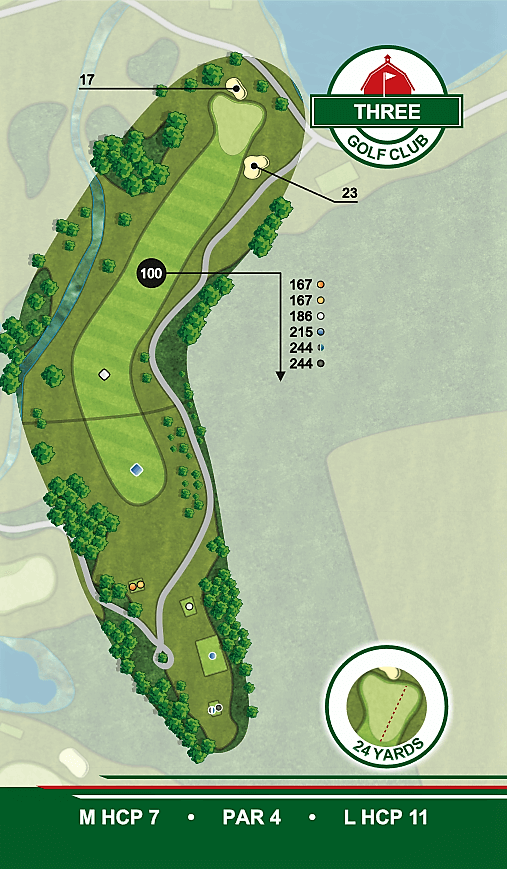
Hole #3: 355 Yards | Par 4
A sharp dogleg right that will require precise distance control with your tee shot. Long off the tee can place you in a hazard and short may not reach the turn.
Hole #4: 347 Yards | Par 4
This is a hole that plays differently depending on which set of tees you choose to play. The white tees create a dogleg right and blue tees play as a straight-away par 4 with a 100 yard carry over water. The left side of the green is guarded by bunkers in front that will collect any miss-hit attempt at a left pin.

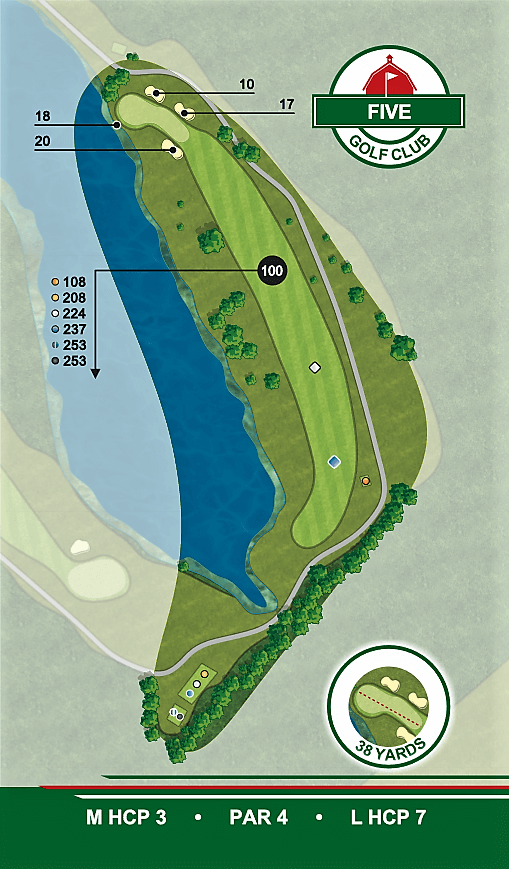
Hole #5: 349 Yards | Par 4
A risk-reward tee shot for all skill levels! This par 4 begs the player to bite off more than they can chew. With a fairway that runs diagonal to the tee and a water carry that runs the length of the hole you must choose tee shot that suits your game. This green boasts the largest tier on the course and anything on the wrong level will make for a tough two putt.
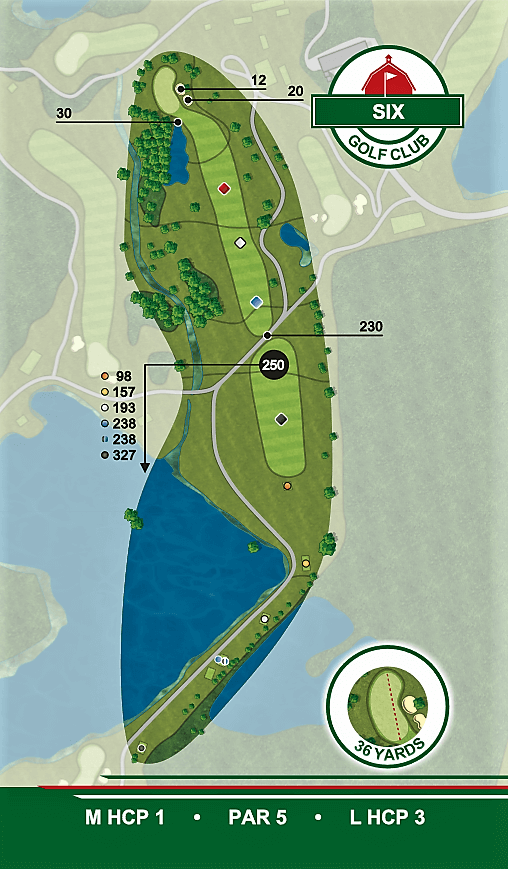
Hole #6: 490 Yards | Par 5
A slight dogleg left par 5, reachable in two for the longer hitters. Anyone going for it in two must carefully maneuver the fortress of tall trees, water, and bunkers that guard the long undulating green.
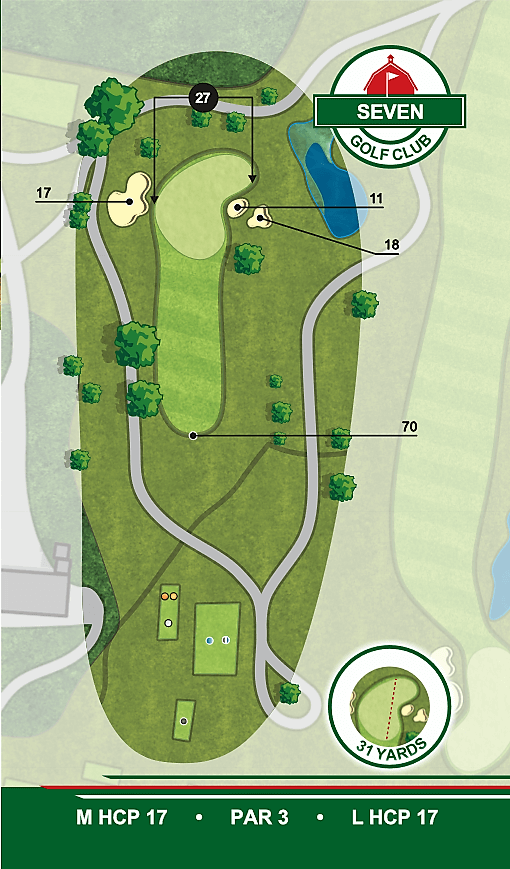
Hole #7: 179 Yards | Par 3
This is a short par 3 that can be benign or treacherous depending on the pin placement and/or the wind.
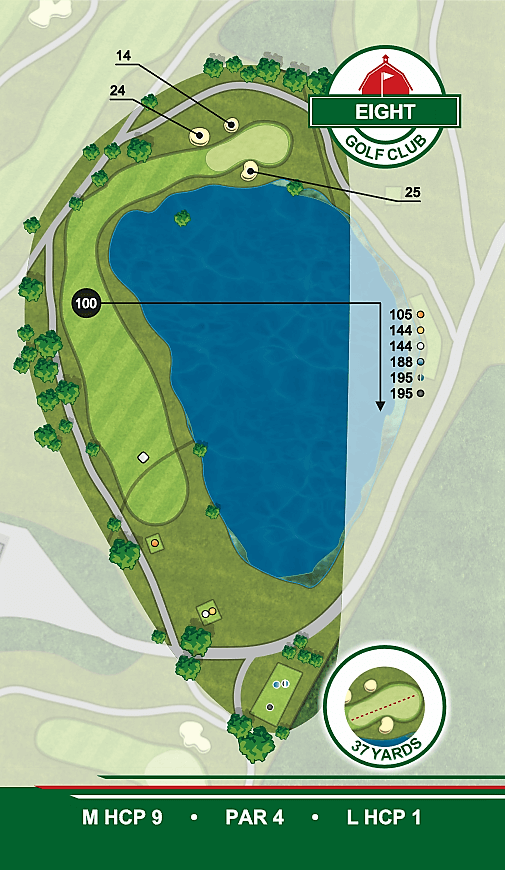
Hole #8: 308 Yards | Par 4
A short but intimidating par 4. The lake is the main focus of the hole and borders the right side of the fairway and the front of the green. Your approach will be a forced carry over water to a long green with strategically placed bunkers. The long hitters will be tempted to go for the green but remember, it’s all carry and long is not always a good option.
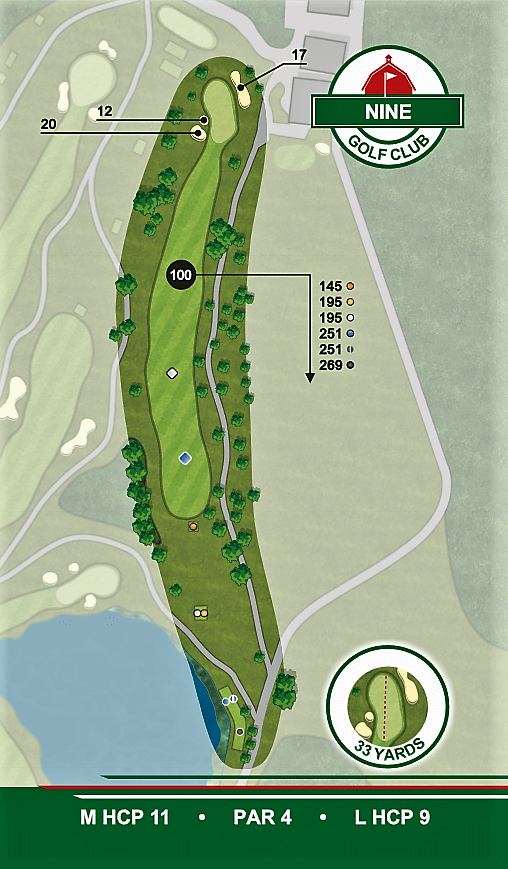
Hole #9: 378 Yards | Par 4
The only hole on the front side without a water hazard in play. #9 is a dogleg right with a severely sloped green from front to back that makes it a tough par if you get above the hole.
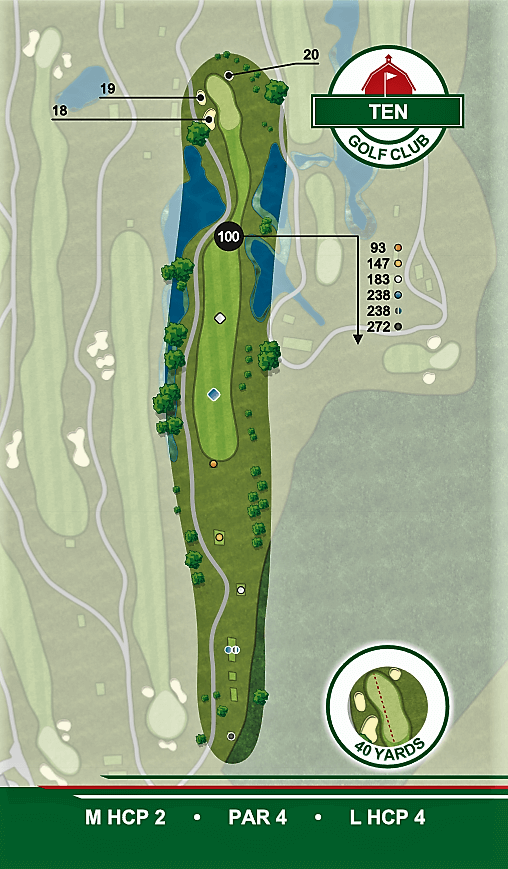
Hole #10: 442 Yards | Par 4
Arguably the toughest hole on the course. Water lining both sides of the fairway makes this a demanding driving hole. Your approach will be a to 40 yard long green with subtle roles that puts a premium on putting.
Hole 11
Hole 12
Hole 13
Hole 14
Hole 15
Hole 16
Hole 17
Hole 18
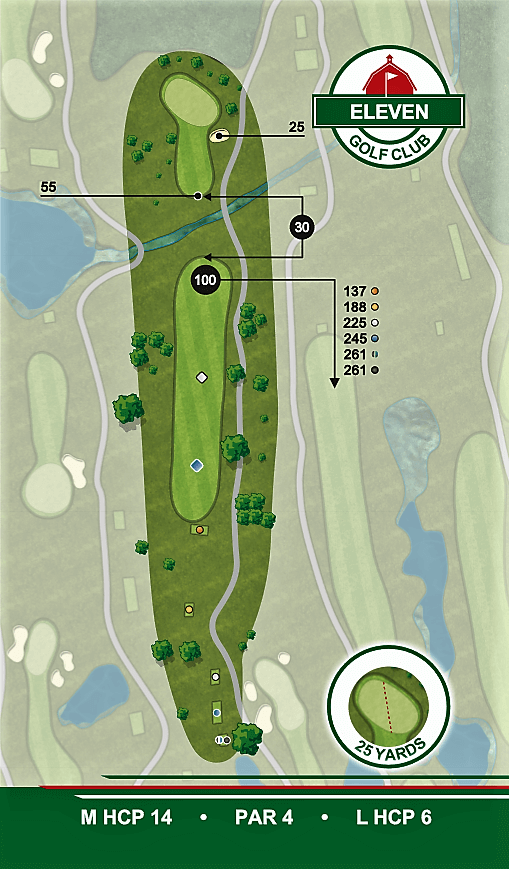
Hole #11: 360 Yards | Par 4
A straight away uphill par 4 that features a water hazard cutting across the fairway at the 80 yard marker. Your second shot is uphill to a green you cannot see so pick your club wisely.
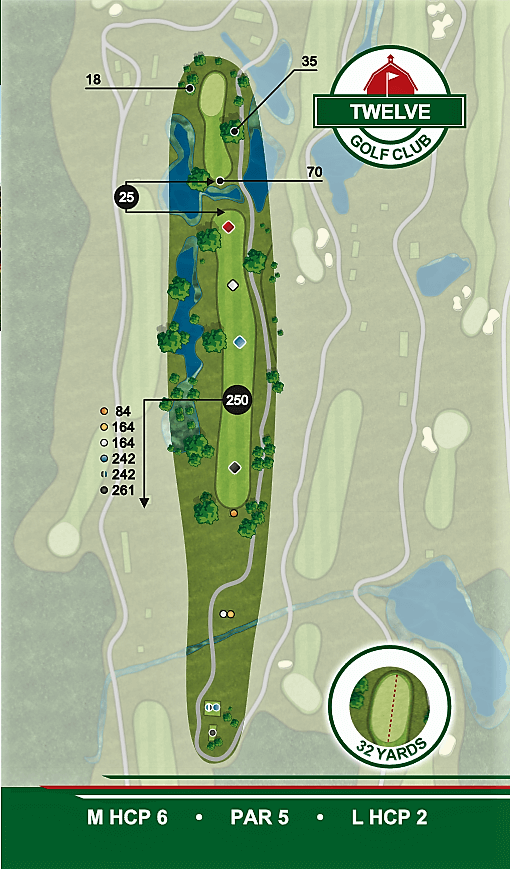
Hole #12: 510 Yards | Par 5
This hole is straight par 5 with hazards along the left side. The hazard cuts across the fairway just past the 100 yard marker to make people think twice about trying to get close.
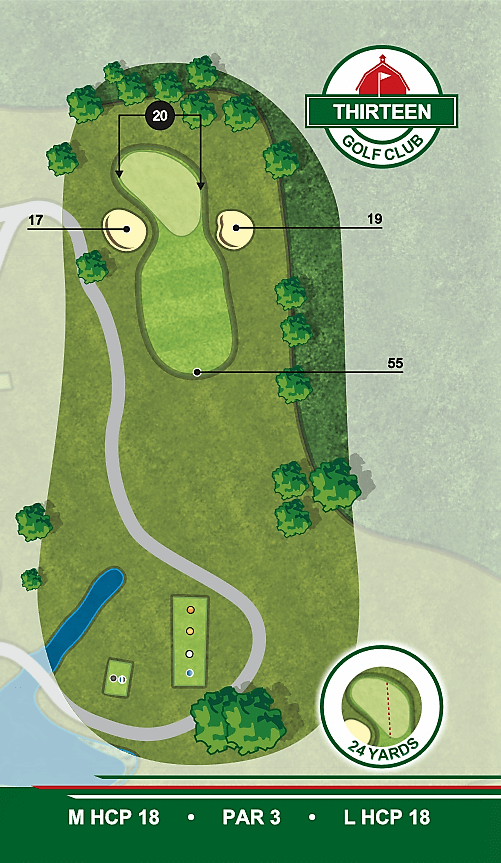
Hole #13: 145 Yards | Par 3
The longest short hole you will ever play. The white tees are marked at 132 yds but will play considerably longer depending on wind direction. Club selection is key to playing this little monster.
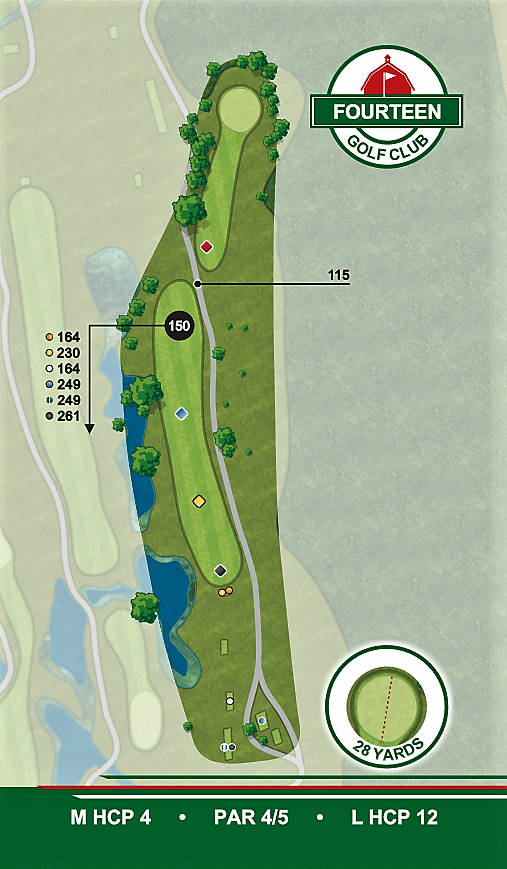
Hole #14: 430 Yards | Par 4
A long par 4 that requires a tee shot to be played down the left side of the fairway. Anything left to the right will be blocked out by a few strategically placed large trees.
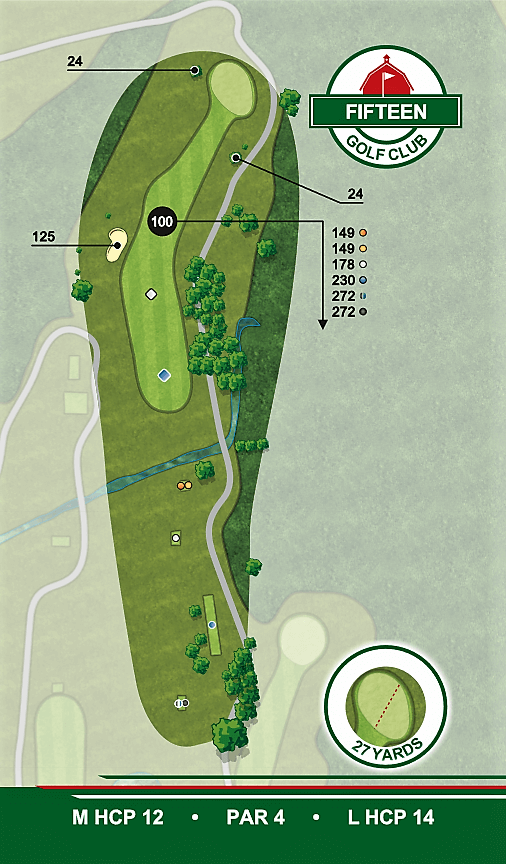
Hole #15: 335 Yards | Par 4
This is an uphill dogleg right that gives the player a good chance at birdie if he/she places their tee shot to the left center of the fairway to avoid the tree line.
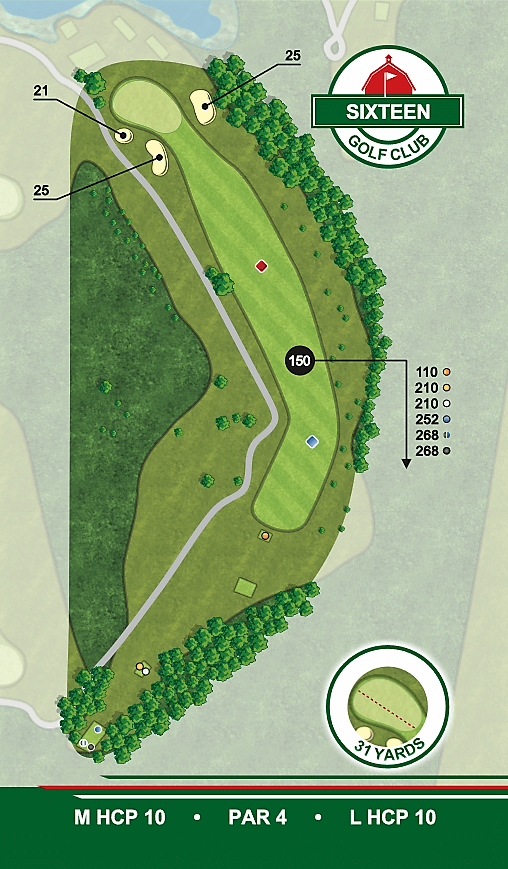
Hole #16: 420 Yards | Par 4
A long downhill par 4 that can be significantly shortened by a well hit tee shot over the corner. The downhill approach shot may prove to be challenging with swirling winds and the elevation change.
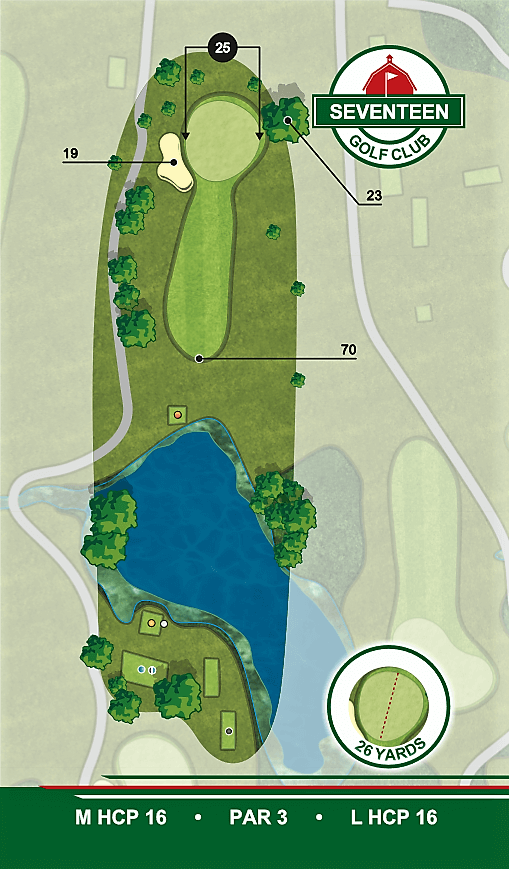
Hole #17: 189 Yards | Par 3
This is a medium range par 3 that plays over a short water carry. The green falls away on all sides so a precise shot is necessary to hitting the green.
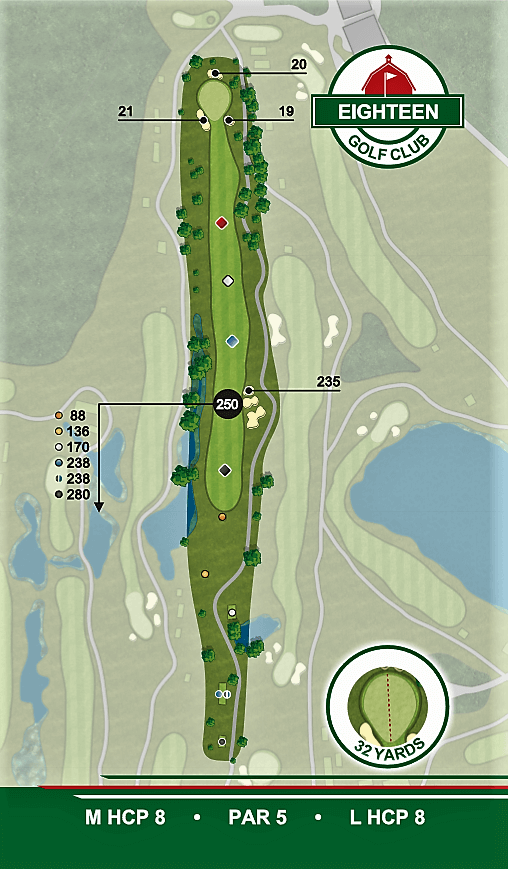
Hole #18: 505 Yards | Par 5
A great finishing straight-away par 5 that screams birdie if you can stay out of trouble and below the hole. Many have 3-putted this hole for par because of the severe slope and many more will.